Thursday, May 30, 2013

A Lotta Nines (Quick Irish Chain Tutorial)

 I love a quilt that comes together fast!  This one is 75"x 90" and only took two evenings' work!  If you've never made an Irish Chain before, they are REALLY simple!  There is a great video tutorial out there using jelly rolls.  I made mine using a fat eighth bundle of Glimma by Lotta Jansdotter (I get almost all my bundles from Amanda at Westwood Acres) and some Kona White.  For my method you will need:
  • 50 strips measuring 3"x21" (I got 60 from my FE bundle, so I just discarded 10)
  • 156" (4.5 yards) of neutral background fabric
    • cut (20) 3"xWOF pieces, then cut those in half to get (40) 3"x21" strips
    • cut (12) 8" x WOF strips, then cut each strip into (5) 8" squares for a total of (60) 8" squares
Make 20 strip sets that are print-neutral-print (p-n-p) and 10 sets that are neutral-print-neutral (n-p-n).  Press all seams open.  If you want to make a different size, just remember you will need double the number of (p-n-p) sets.  So if you make 30 p-n-p sets, you will need 15 n-p-n sets.


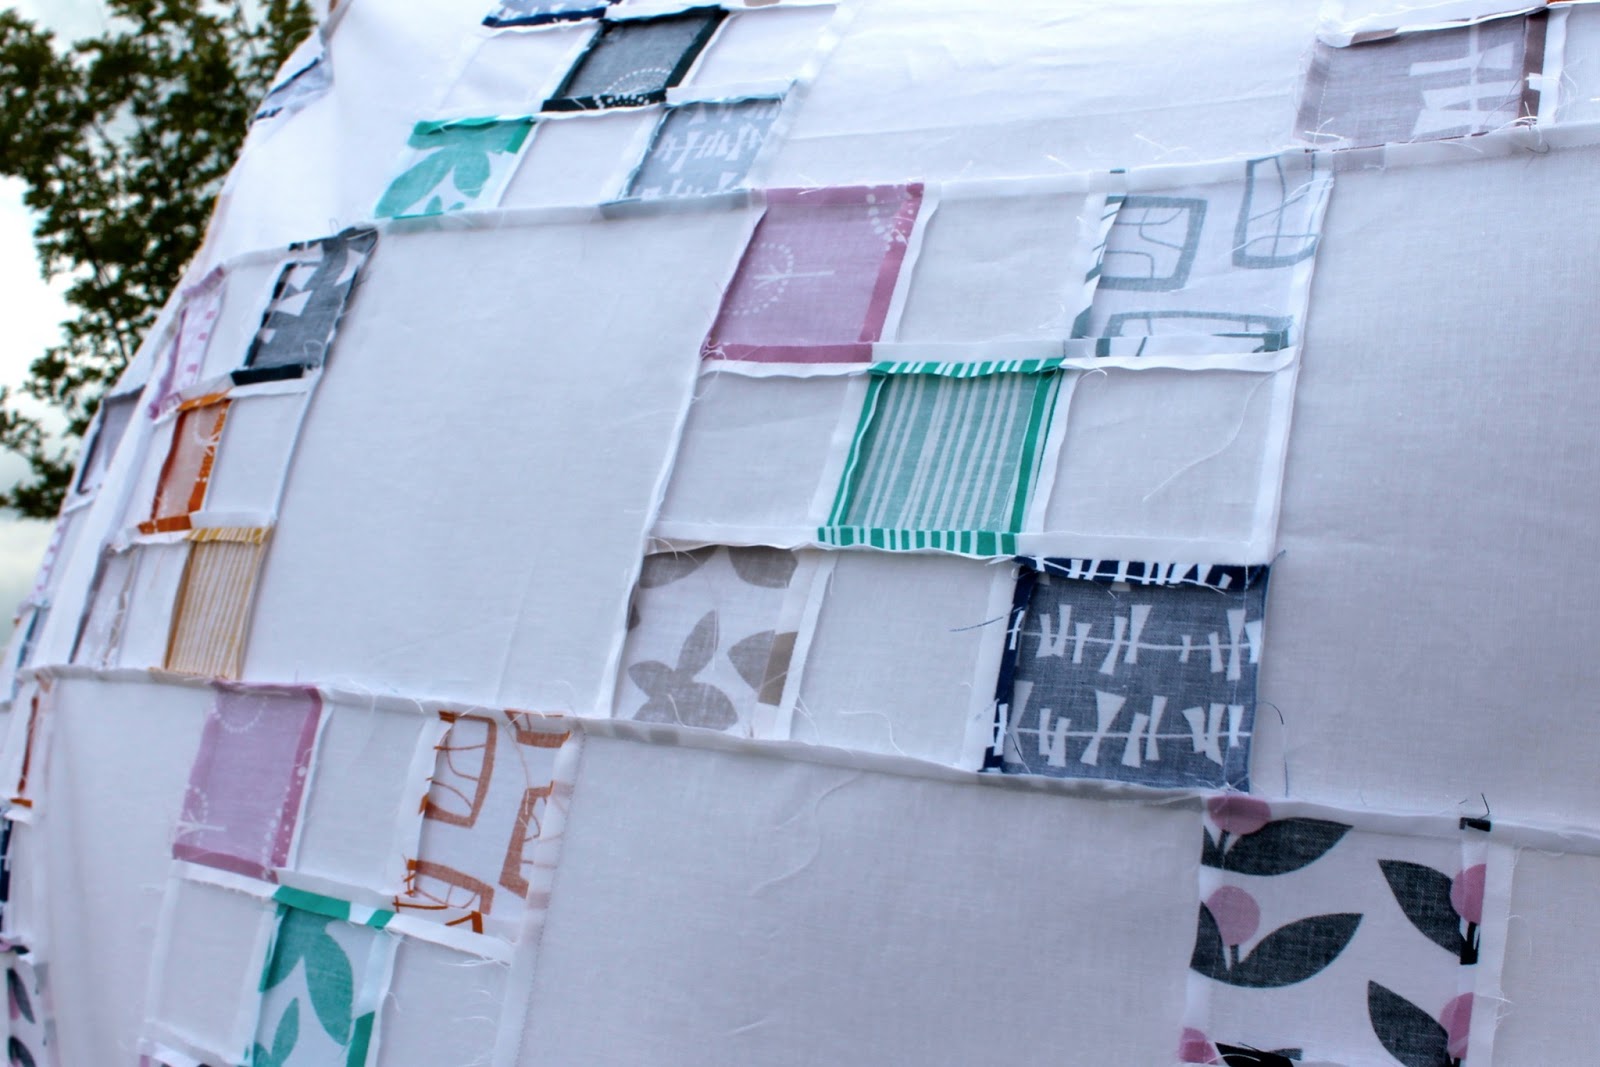
Cut each p-n-p and n-p-n strip into (6) 3" set.  You should now have (120) 3" p-n-p sets and (60) 3" n-p-n sets.  Randomly sew two p-n-p and one n-p-n together, with the n-p-n in the middle to make (60) 9 patch blocks.  Press all seams open.  If you make alternate sizes, remember you will always need equal numbers of 9 patch blocks and neutral 8" squares. 

Then, just alternate 8" neutral squares with your 9 patch blocks.  Voila! Super quick and easy Irish Chain quilt!

I have to thank my friend Stephanie for coming up with the clever title to my post! Thanks girl!


Wednesday, May 29, 2013

Olfa Splash Giveaway

A few weeks ago Olfa sweetly sent me one of their new Splash 45mm rotary cutters to try out!  Now, to be honest, I'm such a girl that the first thing I did when I saw it was squeal, "OH! It's aqua!"  Who says all your notions/tools have to be drab colors???  Plus, it makes it much easier to find in my mess of a sewing room. :)  It works great and is easy to hold, like all Olfa cutters, but the absolute best part is how fast you can change the blade!  You pull down a button on the back and BAM! The blade falls off! Have I mentioned it's AQUA???? So adorable!  Yes, I'm a sucker for all things pretty.

Want to know something else?  Olfa sent me a second Splash cutter to give away!  All you have to do to enter is comment on this blog post!  Maybe tell me your favorite summer song, cocktail, or recipe.  I'll have Mr. Random Number Generator choose a winner on June 5th!

Monday, May 20, 2013

Gifts, Leftovers, Requests, and Progress

I decided at the last minute to make a teacher's gift for my son's Kindergarten teacher.  

I finished it in two days!  I used (42) 10" print squares and (84) 4.5" white squares.  Place the white squares on opposite sides of the print square and sew corner to corner.  Trim, leaving 1/4" seam allowance. 

 Ta-da! Insta-quilt!  I love that it's really simple to put together, but still looks like I put some effort forth!

I even had some backing fabric on hand that was from the same designer as the prints on the front!

The quilting went quickly since I got to use my baby (my Tiara).  I'm working on a video review of that by the way!  I've made the video, I just have to write the post! Is there anything stranger than listening to yourself on film?  I end up sounding like a Southern Elle Woods or something.  ha ha!


After trimming the corners from the quilt at the top, I had all these perfectly matched triangles of prints/neutral all ready to sew!  I whipped out this baby quilt in no time!

I'd been wondering what to do with that yard of Meadow Sweet 2! Perfect backing!

I opted for a coral linen binding for this one.  I like the added texture.

I also quilted more densely than I do on larger quilts.  Makes for an extra crinkly, cuddly quilt!  This one will go in my Etsy shop soon.

Last week I finished two custom quilts for the utterly adorable and completely sweet Kelle Boyd (designer Ann Kelle).  She lives really close to me so I'm a convient quilt monkey. :) 

I adore pixelated hearts!  This one has a completely different look than my last one, but I love it!  It's bright and fresh and summery! 

I used the Remix zig zag print and cut it on the bias for the binding.  I usually don't make bias binding, but I had a feeling this would turn out cool (and I was right!)  It sort of reminds me of a Greek key pattern.  Just love it!

I also designed and made this ballerina quilt for Kelle (Ann Kelle).  I based it off of THIS quilt by Kati.  I'm not sure if Kati used a pattern, but I designed one to fit the dimensions of the ballerinas.  Doesn't it look like candy?  I love all the solids!

And there are loads of ballerinas on the back too!  This fabric line is just too stinkin' cute!!!!

PTS10 pillow top progress! Now to decide on quilting!
I'm also making some progress on my pillow for PTS10!  I just have to decide how I'm going to quilt it!  Decisions, decisions!


Sunday, May 12, 2013

Another Super Tote!


My good friend, Tracey, asked me to make a bag for her to take to Quilt Market this week.  After (much) debate, she finally decided on a slightly modified Super Tote!  She loves linen so I used Essex linen blend in Sand along with some colorful appliquéd petals.  Like my first time making the Super Tote (read about it here), I added a lined, exterior zippered pocket.  Check out my tutorial on how to add the zipper here  it works slightly differently since it's for the exterior and not the interior, but the basics are the same.


Still, my absolute favorite part of this pattern is the gusset that gives the bag so much depth and body!  For interfacing, I used Shape Flex (SF 101) on all the exterior pieces--I do not interface the lining of the back or the pocket linings, but I did interface the interior divided pocket that I added.

For my open exterior pocket, I once again lined it, but I didn't add the piping (or fake piping like I used last time). 

This time I added a triple stitch to the strap.  Since I opted to make the bag cross body, the strap was cut a bit wider and a lot longer than the pattern stipulates.  I cut my strap 3.5" wide and used a .5" seam allowance so the strap finishes at 2.5" wide.  I find for crossbody bags, wider is better--you don't want a narrow strap digging into your chest! I added Shape Flex (SF101) to each side of the strap and I cut a piece of left over batting 3" x length of strap.  You don't want your batting (you could also use fusible fleece) to be the exact same width as your strap or you will have too much bulk in the seams.  How long you cut your strap depends on how tall you are and where you want the bag to fall on your body.

I also assembled the lining and exterior a bit differently this time.  Because I was making a crossbody bag and I was having a hard time deciding if I had the strap length right before the strap was attached.  Instead of leaving a hole in the lining for the bag to be turned, I folded the top edges of the lining and exterior pieces down 1/2" and pressed.  Then I pinned around the top and pinned the strap in place so I could test out different lengths.  Once I cut the strap down to the length I wanted, I inserted about 1" of the strap into the space between the lining and exterior.  Then, I sewed around the top of the bag twice.


The applique was a lot of fun to do and added a pop of color to the linen on either side of the bag.  Plus, I got to dig into my tiny scraps!

For the interior, I modified the pattern by adding a flat open pocket to one side.  It is divided into three compartments so there is a quick storage space for keys, a phone, whatever.  I also added a magnetic snap closure instead of a zipper.  These are quick and easy to do and, frankly, after all that applique, I was anxious to hurry up and finish this! :)  Seriously though, moving the strap location made putting a zipper with ends on the side seem a little crowded.


So if any of you are going to Market and see my bag, please say hi to the sweet lady carrying it!  Her name is Tracey and she rocks! :)

If you want to make your own Super Tote, you can buy Anna's pattern here


Friday, May 10, 2013

Another Instagram-fueled Catchup

I swear I'm here and sewing!  
Cleaned up a little bit! I still have a ton of fabric to fold and put up, but the floor and counters are mostly cleared! #sewmessy
Babylock Symphony is my main sewing machine, top right. The Babylock Tiara is my quilting machine, bottom left.
I had to clean things up because it was getting messy in my sewing room!

Super freaking awesome mail day from @insidethepaperbox and @acraftyfox_amanda !!!! Eeeep! Amanda thank you for the killer scraps!!!!
Had a great day thanks to Jessie (the mini dresden) and Amanda of Westwood Acres (the fabric)

A little Briar Rose mini to tide me over until July! Thanks again @acraftyfox_amanda for the scraps!
I used the Briar Rose scraps to make a mini, though now I'm thinking of taking it apart to make it one long rectangle--just to be different!

PTS 10 progress
I'm working on a pillow for Pillow Talk Swap 10! 

Lots and lots of Liberty HST. Are we liking the simple layout or should I try something more complex?
I'm also working on a Fall-hued Liberty quilt!  Lots of neutrals in this one.   It's not my usual rainbow fest, but I'm sort of liking it!

Candy coated ballerina top for @annkelle complete! Now to make the backing and quilt this yumminess! @babylocksewing
I'm also getting ready to quilt this one!  It's a custom order for Ann Kelle and it looks like candy to me! Love all the solids!

I'm also working on a little review and video for my Babylock Tiara! I've had a number of questions about it and I find that video is the easiest way to answer them.  


Related Posts Plugin for WordPress, Blogger...